This recipe makes a soft and squishy whole-wheat loaf. Conservation Grains’ stone-milled Snowgoose is the star here—15.1% protein Hard White Spring Wheat grown regeneratively at Spring Coulee Farm and blended with a small percentage of locally malted durum. High protein flours need high hydration, so I’ve pushed this to 90% with a long fermentation (5–6 hours room temperature with 4 folds, then shape and into a banneton, cover with a “shower-cap” plastic (you can buy these at Breadtopia, and reuse them), and refrigerate overnight until morning bake).
I’m grateful to Andra Stefanescu at Sourdough Explained for the how-to and Judy Cornel of Conservation Grains for the encouragement to get to a 100% whole grain loaf. Hooray! Snowgoose does it beautifully and the leftovers from my two loaves this week will become croutons for our Thanksgiving dressing (just cut off bottom crust, and as much of the other as makes sense, then cube, onto a sheet pan, and into a 350°F oven for 20 minutes or so, until dried out; baked croutons are not the same as letting the bread go stale, don’t do that and expect it to taste good.)
My method uses a heavy duty pot with a lid, like a Staub or Le Creuset Dutch-oven. For more detailed instructions, please refer to my Sourdough Bâtard or Boule recipe, and my Substack article, “Ten Years of Sourdough Baking“, which includes tips for keeping a sourdough starter.
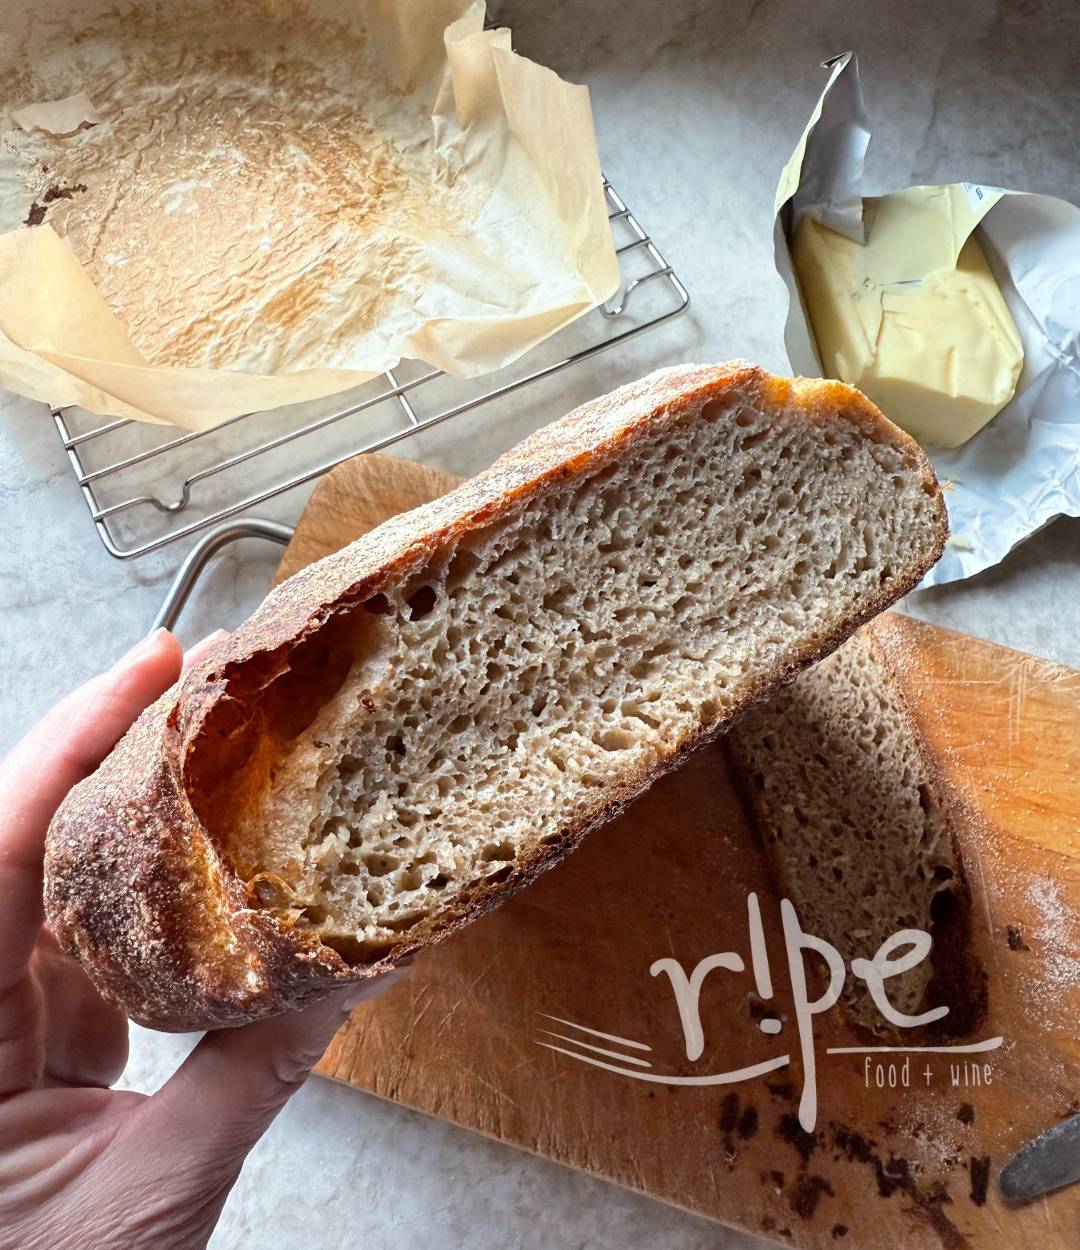
Big bubble in this bake. Crust tastes great with French butter!
Whole-Wheat Sourdough Boule
makes 1 loaf; timing wise, begin autolyse before noon and you will have the bread shaped and in the refrigerator by dinner time, bake first thing next morning (remember to preheat the pot in the oven.)
Ingredients
- 500 grams stone-ground whole wheat flour Conservation Grains Snowgoose, 15.1% pro
- 450 grams water
- 100 grams sourdough starter recently fed and active
- 10 grams salt
Instructions
Autolyse, 1 hour
-
Using a mixer with dough hook, combine the flour with 420 grams water. Cover bowl and allow to rest 1 hour.
Add starter, rest 1 hour
-
Add starter to dough and mix with hook until combined. This begins the "bulk" fermentation.
Add salt and remaining 30 grams water, rest 90 minutes
-
Mix in the salt and dribble in the remaining water while using the dough hook. Raise the speed to get the dough to cling around the hook, but it should still stick to edge of bowl.
Let the dough hook do it's work for 5 or 10 minutes on a low speed after the dough comes together. (In my Sourdough highlight on IG, you can watch a video of the dough at this stage.) Cover bowl and allow to rest for 90 minutes.
Continue bulk fermentation with stretch-and-folds, about 3 to 4 additional hours
-
After the 90 minute rest, I target 4 stretch and folds, one every hour. I do this using a bench scraper, working in the bowl pulling from bottom to top around the clock (noon, 3, 6, 9) just once or maybe twice.
Shape and cold proof overnight in refrigerator
-
After bulk fermentation, use a bench scraper to pull and tuck dough around and under the dough ball, shaping it with your hand and the bench scraper in the other hand until you form a taught, jiggly ball. If it's not somewhat jiggly, ferment a little longer before shaping. Let rest while you prepare the banneton/proofing basket.
Line the banneton with a linen liner then dust with flour.
Basic shaping technique involves turning the dough ball upside down then gently folding it down in thirds like a letter, then spin 180° and repeat—not being afraid of de-gasing the dough but not being too aggressive either. You want the shaped loaf to have a taught "shell" something for the air inside the dough to push against and puff and stretch in the oven.
Pinch ends closed and turn upside down into the lined banneton. Cover with plastic "shower cap" bowl cover or a slightly moist lint-free kitchen towel and set into the refrigerator for a cold proof overnight, maximum of 10-12 hours or the dough will become overly sour.
Alternatively, you can bake the dough same-day. To do this, proof at room temperature for 2–4 hours and then proceed with baking.
Preheat oven and Dutch oven
-
Place covered Dutch-oven into oven (rack lowered just under middle so that covered baker fits) and preheat to 475°F.
Tear a piece of parchment paper large enough to cradle your bread dough into the baking pot, about 15-inches. Get your spray bottle with fresh water ready, flour for dusting, and your lame.
When oven has preheated, carefully remove the covered pot from the oven.
Remove dough from refrigerator and invert onto the parchment paper. Spritz with water, and score lengthwise with the lame. Immediately transfer to the pot by using the parchment as a cradle and lowering it into the hot pot. Return the lid and place back in the oven. Bake for 28–30 minutes at 475°F (lower to 450°F if you have convection); remove lid and bake for 15 minutes longer. Immediately transfer dough to a rack to cool so that the bottom doesn't get too dark.
Recipe Notes / Tips
- Don't expect a big ear on this loaf, as the high hydration won't facilitate that (but it is so worth it to have a soft whole-wheat loaf!)
- This recipe uses a 20% starter to flour ratio. A good target for developing your own bread recipe is 20–30% starter.
- If you keep your starter refrigerated and have fed it within 3 days, you can go ahead and use it full strength (100 grams in the recipe). If older than 3 days but under a week, use 50 grams starter in the recipe and up the flour and water each by 25 grams. If a week or older, it's time to feed your starter. Feed it, let it sit out room temperature for 3 hours or so, then proceed with the recipe (100 grams of starter, stash the rest in the refrigerator).